What the new installer protects
RhinoUI Manager applies the icon and appearance categories included in your package. Shortcuts, aliases, middle-mouse behavior, macros, toolbars, window layouts, and unrelated custom icons remain unchanged unless a package contains that category and you explicitly enable it.
Step 1
Download and extract the complete ZIP
Download your purchased package from Gumroad. Extract it to a normal folder such as Documents or Downloads. Do not run the application from inside the ZIP, and do not move only RhinoUIManager.exe; its Help, Theme, DLL, and configuration files must stay beside it.
Step 2
Close Rhino
Save your work and close every Rhino window. Rhino should remain closed while the Manager applies or restores interface changes.
Step 3
Run RhinoUI Manager
Open the extracted folder and run RhinoUIManager.exe. Because the current build is not code-signed, Windows may show a SmartScreen notice. Confirm that the file came from your official Gumroad download before continuing.
Step 4
Choose the target environment
Select Default for normal Rhino launches and files opened by double-clicking. Choose another environment only if you intentionally maintain a separate Rhino setup.
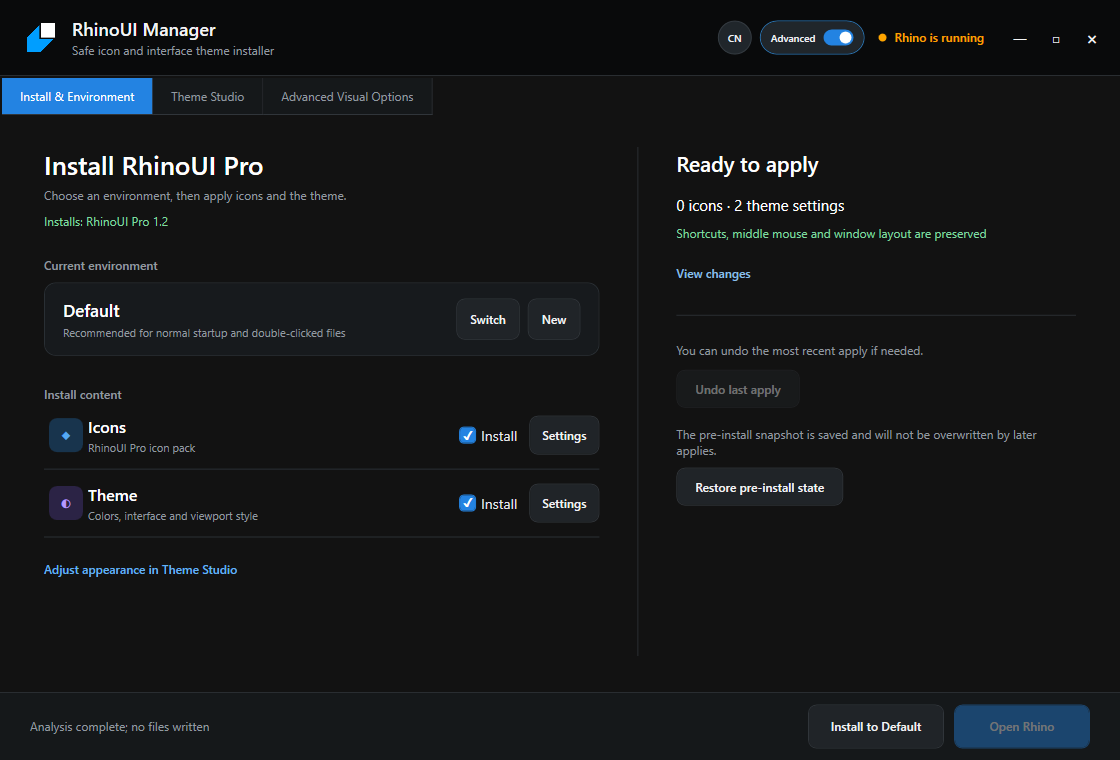
Step 5
Review the changes, then apply
Open View changes if you want to inspect the detected icon and theme updates. Choose Apply or Apply and open Rhino. Before its first installation, the Manager creates a pre-install baseline automatically.
Step 6
Verify the result—or restore
Open Rhino and inspect the toolbars and panels you use most. If the appearance does not refresh immediately, restart Rhino. To return to the state from before RhinoUI was installed, close Rhino and choose Restore pre-install state in the Manager.
Updating to a newer RhinoUI package
Extract each new version into a new folder instead of overwriting the previous one. Run the newer Manager, choose the same environment, review the analysis, and apply. The Manager writes only the theme content that needs to be added or updated; unselected personal settings remain in place.